Home » Environmental Monitoring & Sampling » Direct Push continuous sampling
Environmental Monitoring & Sampling
Direct-Push has re-defined how contaminated sites are assessed
We are experts at executing environmental sampling programs at complex sites. CDS has a broad base of experience, at hundreds of sites across western Canada, using direct-push tools, techniques and equipment.
Over the years, we’ve worked with different sampling tools and techniques. We believe that direct-push is the best at balancing cost and quality - so do organizations and regulators across North America. We have advanced thousands of bore holes and completed monitoring wells across all western provinces under a variety of conditions. Direct-Push refers to tools and sensors that are “pushed” into the ground, usually by hydraulic percussion. Direct-Push assessment techniques are unique because they do not involve drilling to remove soil or make a path for the tool – like traditional augering methods.
Direct-Push has re-defined how contaminated sites are assessed – in many jurisdictions it is one of the few assessment techniques approved for use by regulators.
There are numerous reasons why this technique has found such wide acceptance in the field, including:
Dual tube tooling is used to collect soil samplers continuously from the surface or from a desired depth below the surface while minimizing the chance of liner failure.
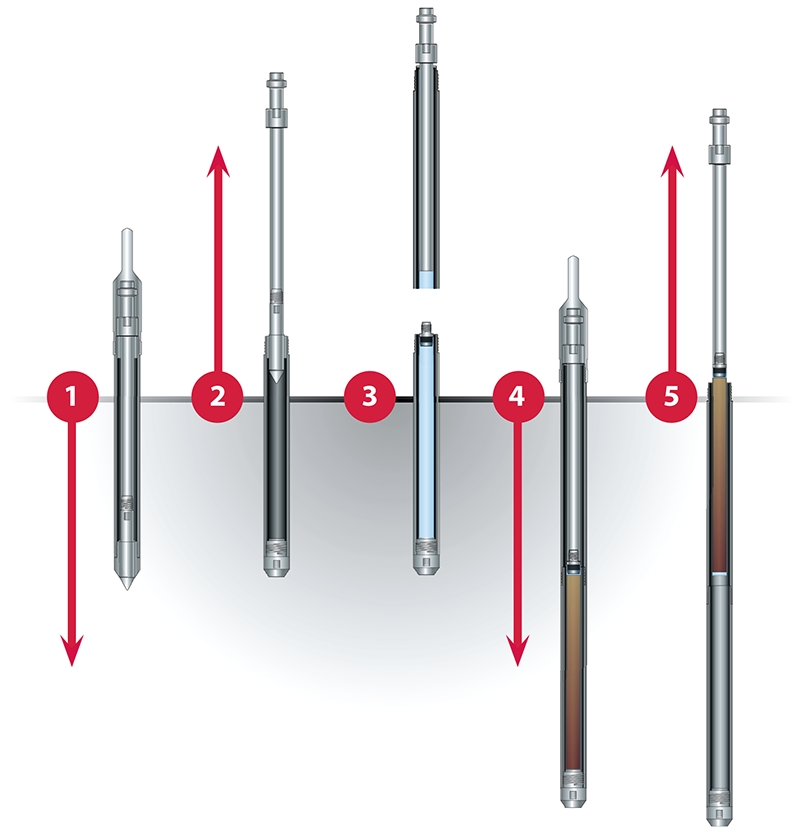
Push the dual tube sampling tools to the depth where soil sampling is to begin.
Once at depth, the internal extension attached to the inner drive tip is removed.
Add a liner, liner grabber, internal extension, threadprotector cap, and external drive head.
At this point the extensions are direct pushed approximately to the same length as the liner that is being used.
Upon collection of the sample, the internal extension with the attached liner and soil sample is removed.
Continuous sampling can be conducted by repeating steps shown in figures 3 and 5 to the maximum desired depth.
![]()
